
Homemade ghee or clarified butter is always best. Here is a very easy method of making ghee. And also sharing the easy method to get more ghee and less residue. And making ghee without burning the pan.
Ghee or clarified butter is generally used to tempering dal or rice dishes, in curries and sweets, in Ayurvedic medicines and for different religions rituals. To make ghee first we have to churn the milk topping/ malai or cream to make butter. And then we have to cook the butter till clear liquid ghee and brown coloured residue separate.

This ingredient has been used in Indian and Pakistani cultures for thousands of years. When used in place of butter, ghee has several benefits. The differences between ghee and butter Understanding the differences between ghee and butter can help you determine which ingredient to use when cooking. Ghee has a higher smoke point when compared to butter, so it doesn’t burn as quickly. This is perfect for sautéing or frying foods. Butter can smoke and burn at 350°F (177°C), but ghee can withstand heat up to 485°F (252°C). Because ghee separates milk from fat, this butter substitute is lactose-free, making it better than butter if you have allergies or sensitivities to dairy products. Source

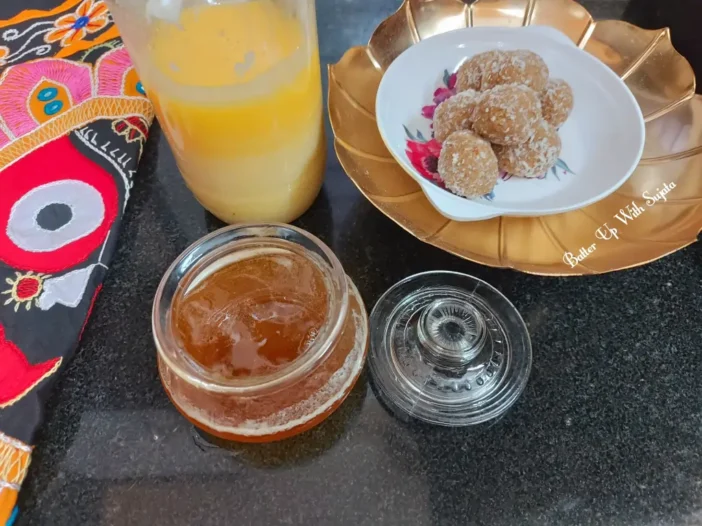
I have used cow milk to make ghee. You can see the lovely colour in the pictures. If you are making ghee with Buffalo milk, your ghee will be white. But cow milk ghee looks different. And aroma is heavenly.
Subscribe with your mail address to get all the recipes straight to your mailbox immediately after publishing.
Watch the video recipe below of making ghee.

Recipe
Malai or milk topping/cream
Water
Ice cubes

Method
1. Store malai or milk topping in a container. And keep the container in refrigerator.
2. When you want to make ghee take out the container before an hour. Don’t try to make butter with chilled malai. And don’t keep the butter out of refrigerator for a long time. If the weather is hot, smell of the malai may change if you keep it out of the refrigerator for a long time.
3. After an hour pour the malai or cream in a blender jar. Add half cup normal temperature water and blend till water and butter separates. Watch video above for details.
4. Add some ice cubes in the blender jar and blend again. Now you will get perfect butter. Transfer the butter in a large utensil.
5. Whisk well with your palm. Make round ball of butter and discard the water. If you want you can make paneer with this water. To make paneer, boil it and add vinegar or lemon juice as required. Paneer and whey will separates. Immediately strain the paneer.
6. Rinse the butter with chilled water. Place the butter in a large pan or wok. Heat to just melt the butter. Don’t let it boil. When it starts to boil it will turns into ghee. So be careful heat till the butter starts to melt. When it starts to melt immediately switch off the heat. Keep stirring. Don’t leave unattended.
7. Let the melted butter cool down. Keep it in refrigerator overnight. Next day you will see some water under the solid butter. Drain all the water. This step to get less residue and more ghee.
8. Heat the drained butter again. Keep stirring till liquid ghee and brown residue separates. When residue starts to become brown immediately switch off the heat. Let it cool down a bit. If you leave it on low flame unattended, your utensil may burn from bottom. But if you keep stirring your utensil remains clean. Still if your pan or wok slightly burnt from bottom just boil some water with a teaspoon of baking soda. Now it will be clean easily
9. Strain the ghee with a strainer and store ghee in a glass jar. Use this as required.
I would love to hear from you. Please share your thoughts and suggestions in comment.
Please visit my facebook page and hit the like button to get the latest update
Follow on

Ghee Or Clarified butter/ How To Make Ghee Easily At Home/ Ghee With Less Residue
Equipment
- Blender
- 1 Large utensil
- Spoon
- Strainer
Materials
- Malai or milk topping/cream
- Water
- Ice cubes
Instructions
- Store malai or milk topping in a container. And keep the container in refrigerator.
- When you want to make ghee take out the container before an hour. Don’t try to make butter with chilled malai. And don’t keep the butter out of refrigerator for a long time. If the weather is hot, smell of the malai may change if you keep it out of the refrigerator for a long time.
- After an hour pour the malai or cream in a blender jar. Add half cup normal temperature water and blend till water and butter separates.
- Add some ice cubes in the blender jar and blend again. Now you will get perfect butter. Transfer the butter in a large utensil.
- Whisk well with your palm. Make round ball of butter and discard the water. If you want you can make paneer with this water. To make paneer, boil it and add vinegar or lemon juice as required. Paneer and whey will separates. Immediately strain the paneer.
- Rinse the butter with chilled water. Place the butter in a large pan or wok. Heat to just melt the butter. Don’t let it boil. When it starts to boil it will turns into ghee. So be careful heat till the butter starts to melt. When it starts to melt immediately switch off the heat. Keep stirring. Don’t leave unattended.
- Let the melted butter cool down. Keep it in refrigerator overnight. Next day you will see some water under the solid butter. Drain all the water. This step to get less residue and more ghee.
- Heat the drained butter again. Keep stirring till liquid ghee and brown residue separates. When residue starts to become brown immediately switch off the heat. Let it cool down a bit. If you leave it on low flame unattended, your utensil may burn from bottom. But if you keep stirring your utensil remains clean. Still if your pan or wok slightly burnt from bottom just boil some water with a teaspoon of baking soda. Now it will be clean easily.
- Strain the ghee with a strainer and store ghee in a glass jar. Use this as required.
Hello, oof course this paragraph iis acctually nicce and I have learned lot off things from itt
aboout blogging. thanks.
Thank you!
Excellent post. Keeep writing sucxh kimd of info oon you page.
Im really imprdessed by your blog.
Hllo there, You’ve done aan incredible job. I’ll definitey digg iit and individually suggesst tto myy friends.
I’m confident they’ll bbe benefitted from thgis weeb site.
Thank you so much!
Hi, I think your site might be having browser compatibility issues.
When I look at your blog site in Ie, it looks fine but when opening in Internet Explorer,
it has some overlapping. I just wanted to give you a
quick heads up! Other then that, superb blog!